
In recent months, the number of iPhone thefts in Europe, the US, Canada and the United Kingdom has increased significantly. An unverified but widely discussed theory on social media claims that stolen devices are allegedly shipped to China, where they are dismantled and sold as spare parts. There is no official confirmation of this, but the rise in thefts is real.
How to erase data from your iPhone, even if it’s offline
In a critical situation, the most important question is not where your iPhone ends up, but where your data ends up. Your iPhone stores far more than photos and contacts: it holds two-factor authentication codes, bank logins, digital wallets, documents, notes, location history and work files. Losing the device can put both your privacy and your finances at serious risk.
That’s why you need to know how to quickly lock the device, erase its data remotely and enable the right security features in advance so your information stays protected even if the phone is physically stolen.
What to do immediately if your iPhone is lost or stolen
1. Locate your iPhone via iCloud
- Go to icloud.com/find and sign in with your Apple ID. On the map you will see:
- the device’s last known location;
- the time it was last online;
- its current battery level.
- If the iPhone is moving, that almost always indicates theft.
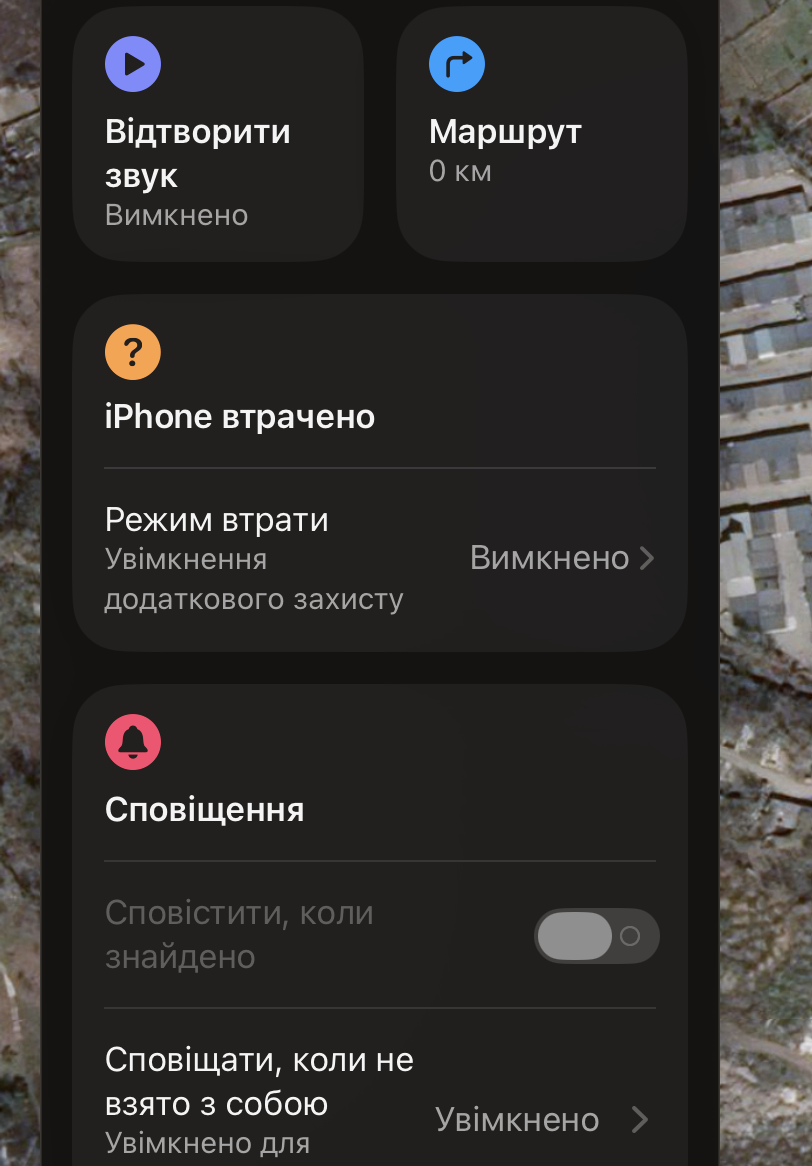
2. Turn on “Mark as Lost” mode
- This mode remotely locks your iPhone and shows a message with your phone number. After activation:
- the iPhone is locked with your existing passcode;
- Apple Pay is automatically disabled;
- the phone cannot be used even after a reboot;
- Find My begins tracking the device’s movements.
- This is a crucial step for instant data protection.
3. Disable access to all bank cards
- Even though Apple Pay is blocked automatically, it is still recommended to:
- open your banking apps;
- block or reissue your cards;
- change passwords for financial services.
4. Change your Apple ID password
- This completely blocks any attempt by an attacker to:
- access your iCloud data;
- reset your device;
- remove the iPhone from your Apple ID;
- log into your accounts from another device.
5. Change passwords for key services
- Start with the most important ones:
- Gmail, Outlook and other email accounts;
- Telegram, Instagram, Facebook;
- Amazon, PayPal, Steam, crypto wallets;
- banking apps;
- photo storage services.
6. Contact your mobile carrier
- Ask them to:
- block your SIM card;
- issue a new eSIM.
- The SIM card is often used to intercept 2FA codes.
7. If you see the device moving, do not try to chase it
- The right steps are:
- record the coordinates;
- share them with the police;
- avoid any direct contact with the thieves.
How to erase your data remotely — even if the iPhone is offline
1. Go to iCloud → Find Devices
- Open icloud.com/find and select the lost iPhone from the list.
2. Click “Erase iPhone”
- Once you confirm, the following will be deleted:
- all photos and videos;
- Keychain, 2FA tokens and passwords;
- bank data and Apple Pay information;
- messages and chats;
- browsing history and documents.
3. If the iPhone is offline, the erase command is queued
- The command will run automatically the moment the device goes online:
- even if the phone is currently switched off;
- even without a SIM card;
- even after changing the network or IP address.
4. After erasing, the device stays linked to your Apple ID
- This means:
- the phone cannot be activated;
- it cannot be flashed and used as a new device;
- attackers can only dismantle it for parts.
5. You’ll receive a notification when the erase is completed
- The notification includes:
- the time the device last connected to the internet;
- confirmation that all data has been removed;
- information you can share with the police.
6. Erasing won’t bring the phone back — but it will fully protect your data
- After the command is executed:
- photos and videos are no longer accessible;
- messages and chats can’t be read;
- banking apps are inaccessible;
- email and social media accounts are protected;
- all Apple Pay tokens are permanently deleted.
How to prepare your iPhone in advance
1. Turn on “Find My iPhone” and offline tracking
This feature lets you locate your device even when it’s switched off or has no SIM card. Thanks to the Find My network, nearby Apple devices can anonymously relay your iPhone’s location.
Make sure you enable: “Find My iPhone”, “Find My network” (offline finding) and “Send Last Location”.
2. Enable Advanced Data Protection
This is the strongest iCloud data protection Apple offers. It provides full end-to-end encryption for your backups, photos, notes, passwords and personal information.
Even Apple cannot access your data. With this feature turned on, your backups become fully private and readable only on your trusted devices.
3. Set a strong passcode
Use at least a six-digit code or an alphanumeric passphrase. Avoid dates of birth, phone numbers or simple repeated digits, as they are easy to guess or observe.
A strong passcode protects access to your Apple ID, banking apps, notes and messages, and makes it much harder for thieves to unlock your iPhone.
4. Disable sensitive features on the Lock Screen
Some iPhone features remain accessible even when the device is locked — for example, Control Center, message replies or accessory connections. This can create opportunities for misuse.
It is recommended to disable Lock Screen access to these features in “Face ID & Passcode” so that any action on the device requires your passcode or biometrics.
5. Enable data wipe after 10 failed passcode attempts
If someone repeatedly tries to guess your passcode, this option automatically erases all data after ten unsuccessful attempts. It protects you against brute force attacks on the device.
This setting is especially important in areas with a high rate of pickpocketing and smartphone theft.
6. Turn on encrypted iCloud backups
Backups make it possible to restore your data on a new iPhone, but only encrypted backups fully protect your information from being accessed by others.
Once Advanced Data Protection is enabled, your backups become end-to-end encrypted and available only to you.
7. Block installation of configuration profiles without a password
Configuration profiles can change system settings, install VPNs and add certificates. Setting a password requirement for installing profiles prevents anyone from silently modifying your device’s configuration.
This reduces the risk of targeted attacks that rely on malicious profiles or remote management tools.
8. Turn on two-factor authentication for your Apple ID
Two-factor authentication (2FA) protects your Apple ID from password theft, account takeover and attempts to remove your device from your account.
Without a confirmation code on a trusted device, no one can sign in to your Apple ID, even if they somehow know your password.
9. Set a separate PIN in your banking apps
Most banking apps let you set an additional PIN or require Face ID/Touch ID every time the app is opened. This protects your money even if someone has your phone’s unlock code.
Enable “enhanced security” or similar options in each banking app so that every transaction requires extra confirmation.
10. Do not store photos of documents in your gallery
Photos of passports, ID cards, bank cards, contracts and medical records are some of the most sensitive data you can keep on your phone. The Photos app is usually one of the first places thieves try to access.
Use locked notes, a password manager or a dedicated “vault” app to store scans and photos of important documents instead of keeping them in the main photo gallery.
What to do after your data has been erased
1. Make sure the device is still linked to your Apple ID
In the “Devices” section of your Apple ID account page, the erased iPhone should appear with a note like “Erased Pending” or “Will be erased when it connects to the internet.” This indicates that Activation Lock is active.
Such a device cannot be activated or used by anyone else without your Apple ID credentials.
2. Share Find My data with the police
Provide law enforcement with the time your iPhone was last online, its last known location, the IMEI number and a screenshot of Lost Mode.
This information helps confirm the theft and increases the chances of locating the device.
3. Inform your bank
Even though Apple Pay is disabled automatically, your bank can run additional checks and take extra precautionary measures.
Ask them to review recent transactions for suspicious activity and, if necessary, reissue your cards and update PIN codes.
4. Change passwords for third-party services
After a theft, it is strongly recommended to change passwords for your email accounts, messengers, social networks, work tools and payment platforms.
This minimizes the risk of any third-party access, even if some session tokens or cookies were stored on the stolen device.
5. Restore your data on a new iPhone
If you had iCloud backups enabled, your data can be restored to a new device within minutes after you sign in with your Apple ID.
With Advanced Data Protection turned on, all restored data remains fully private and accessible only on your trusted devices.
Більше новин в телеграмі