How to Screenshot on Mac: The Complete Guide
Every screenshot shortcut for macOS — full screen, partial area, specific window, and screen recording — with visual key combinations.
In this guide
1. Capture the entire screen
This takes a screenshot of everything visible on your display and saves it to your desktop as a .png file.
If you use multiple monitors, this command captures each screen as a separate image file.
2. Capture a selected area
Best for grabbing just part of the screen — a dialog box, a piece of text, or an image.
Your cursor turns into a crosshair. Click and drag to draw a selection box, then release to capture it.
Tip: hold Space while dragging to move the selection box without resizing it. Hold Shift while dragging to lock one edge in place.
3. Capture a specific window
Grabs a single window — such as a browser tab or app — with a clean drop shadow automatically added.
The crosshair turns into a camera icon. Hover over any window to highlight it in blue, then click to capture just that window.
4. Use the Screenshot app
macOS Mojave (2018) and later include a dedicated toolbar with more options and a live preview thumbnail.
This opens a floating toolbar at the bottom of the screen letting you choose: entire screen, selected window, or selected portion — plus options to set a capture timer and choose a save location.
5. Record your screen
The same Screenshot app toolbar can record video, not just stills.
Then choose Record Entire Screen or Record Selected Portion from the toolbar, and click Record. Click the stop icon in the menu bar (or press ⌘+⌃+Esc) to finish.
6. Capture the Touch Bar
For MacBook Pro models with a Touch Bar:
This saves a thin image of whatever is currently displayed on the Touch Bar to your desktop.
7. Copy to clipboard instead of saving a file
Add ⌃ (Control) to any of the shortcuts above to copy the screenshot to your clipboard instead of saving a file — ready to paste directly into Mail, Messages, or a document.
8. Where screenshots are saved
By default, screenshots save to the Desktop as Screenshot [date] at [time].png.
To change this: open the Screenshot app (⌘+Shift+5) → Options → choose Desktop, Documents, Clipboard, Mail, Messages, Preview, or a custom folder.
9. Full shortcut cheat sheet
| Action | Shortcut |
|---|---|
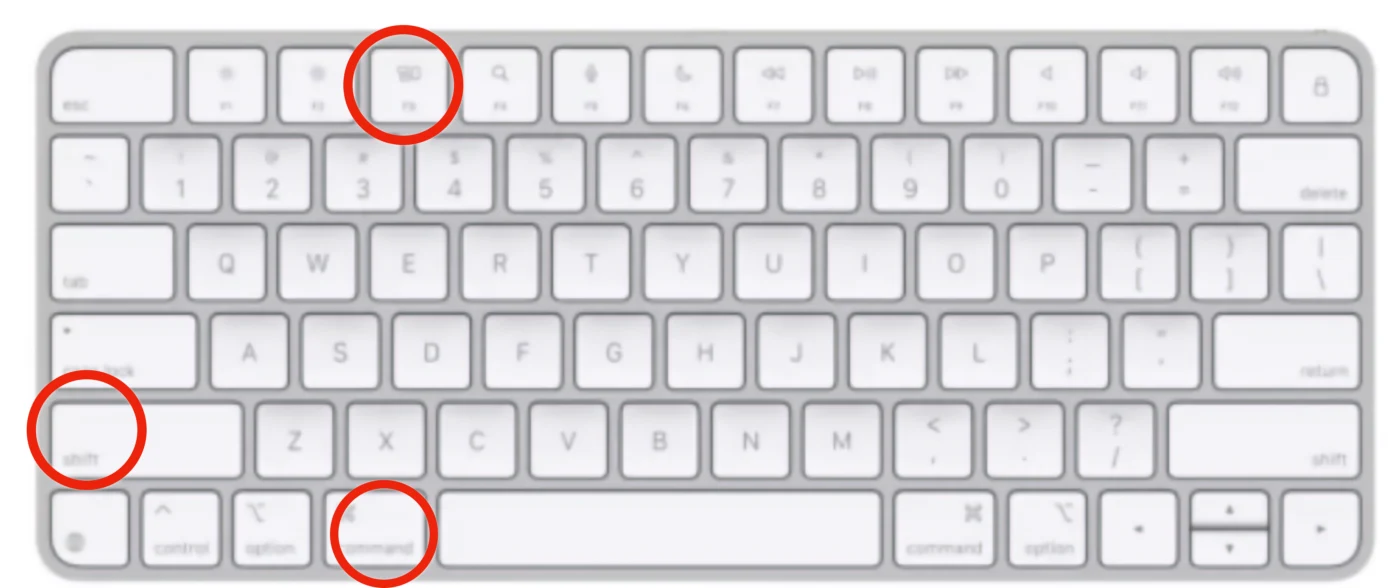
| Entire screen | Cmd + Shift + 3 |
| Selected area | Cmd + Shift + 4 |
| Specific window | Cmd + Shift + 4, then Space |
| Screenshot & recording toolbar | Cmd + Shift + 5 |
| Touch Bar | Cmd + Shift + 6 |
| Copy to clipboard (add to any above) | + ⌃ |
| Stop screen recording | ⌘ ⌃ Esc |
FAQ
Why isn’t Cmd+Shift+3 working on my Mac?
Check System Settings → Keyboard → Keyboard Shortcuts → Screenshots to confirm the shortcuts haven’t been disabled or reassigned.
Can I screenshot on a Mac without a keyboard shortcut?
Yes — open Launchpad → Other → Screenshot, or search “Screenshot” in Spotlight (⌘ + Space), to use the toolbar without memorizing shortcuts.
Why does my screenshot look blurry?
On Retina displays, screenshots are captured at full resolution — blurriness usually means the image was resized after saving. Open it in Preview to check its original dimensions.
Does macOS support screenshotting a menu that’s open?
Yes: open the menu first, then press Cmd + Shift + 4, then Space to capture it along with the highlighted window beneath it.
Більше новин в телеграмі